
You can now add Friends on Minecraft Java, and here's how!
2024-09-03 09:00:29Source:JuxiaAuthor:Juxia
For over 15 years, Minecraft has captivated millions of players around the globe, with its popularity only growing over time. The game is available in two versions: Java and Bedrock Edition. While these editions share many similarities, there are distinct differences between them. One notable difference is that adding friends is straightforward in the Bedrock Edition, whereas the process is a bit more complex in the Java Edition.
This guide will explore all the methods available for adding friends in Minecraft Java Edition. Whether you’re looking for a quick and simple paid option or a more involved free alternative, here’s how you can enjoy playing Minecraft with your friends without the Bedrock Edition.
Adding Friends in Minecraft Java Edition
First, let's clarify what "adding friends" means in the context of Minecraft. In Java Edition, this involves inviting other players to join your game world for a shared experience. The simplest way to do this is by subscribing to Realms Plus, which provides access to Mojang Studios’ servers, allowing you to host your own world.
Subscribing to Realms Plus is easy. Just navigate to the “Realms” tab in the game and sign up for their monthly subscription plan. While there is a fee involved, which varies depending on your location, this method offers the most convenient way to play Minecraft with friends. Once you’ve subscribed and completed the payment process, you can create a Realms world and invite your friends to join.
For those looking for a free way to play with friends, hosting your own LAN server is a great option.
This method involves you hosting the world, while your friends connect to it. Follow these steps to set up a LAN world:
1. Open Minecraft and select the world you wish to share with a friend, or create a new one.
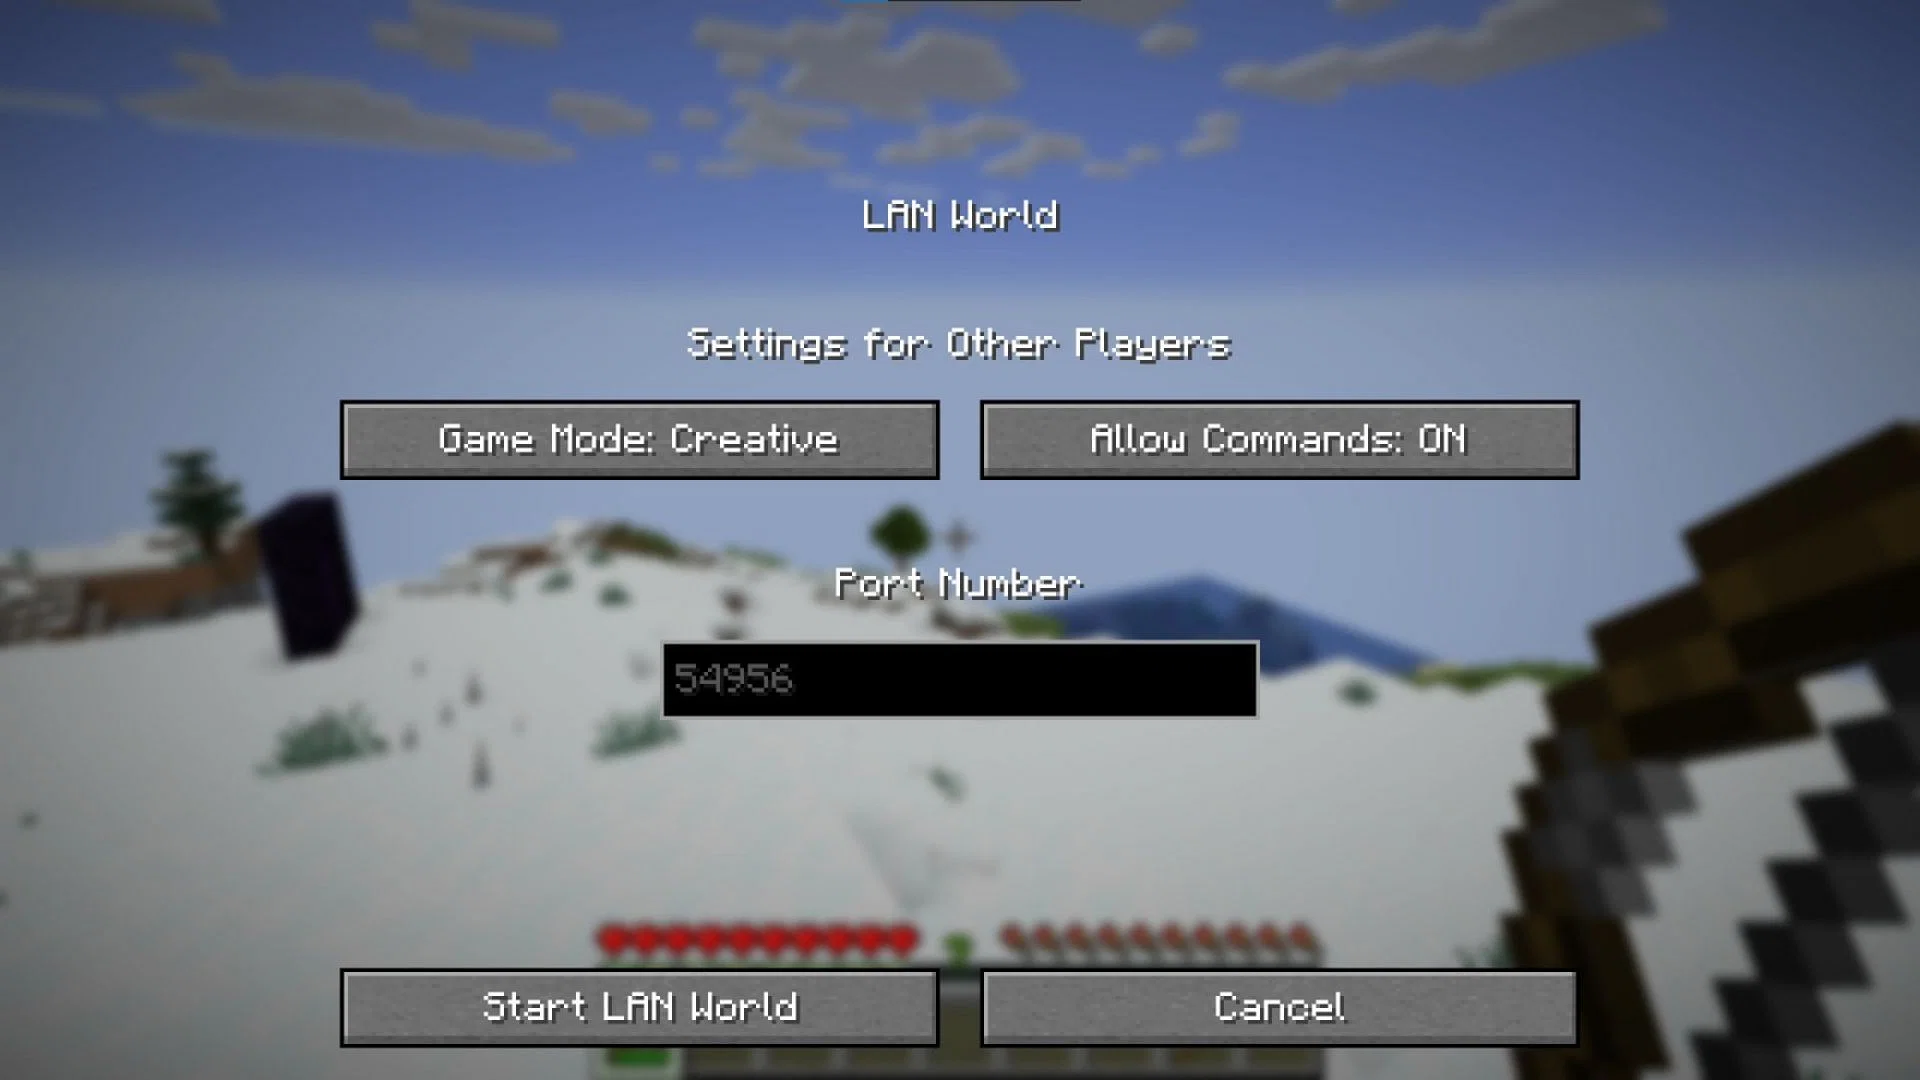
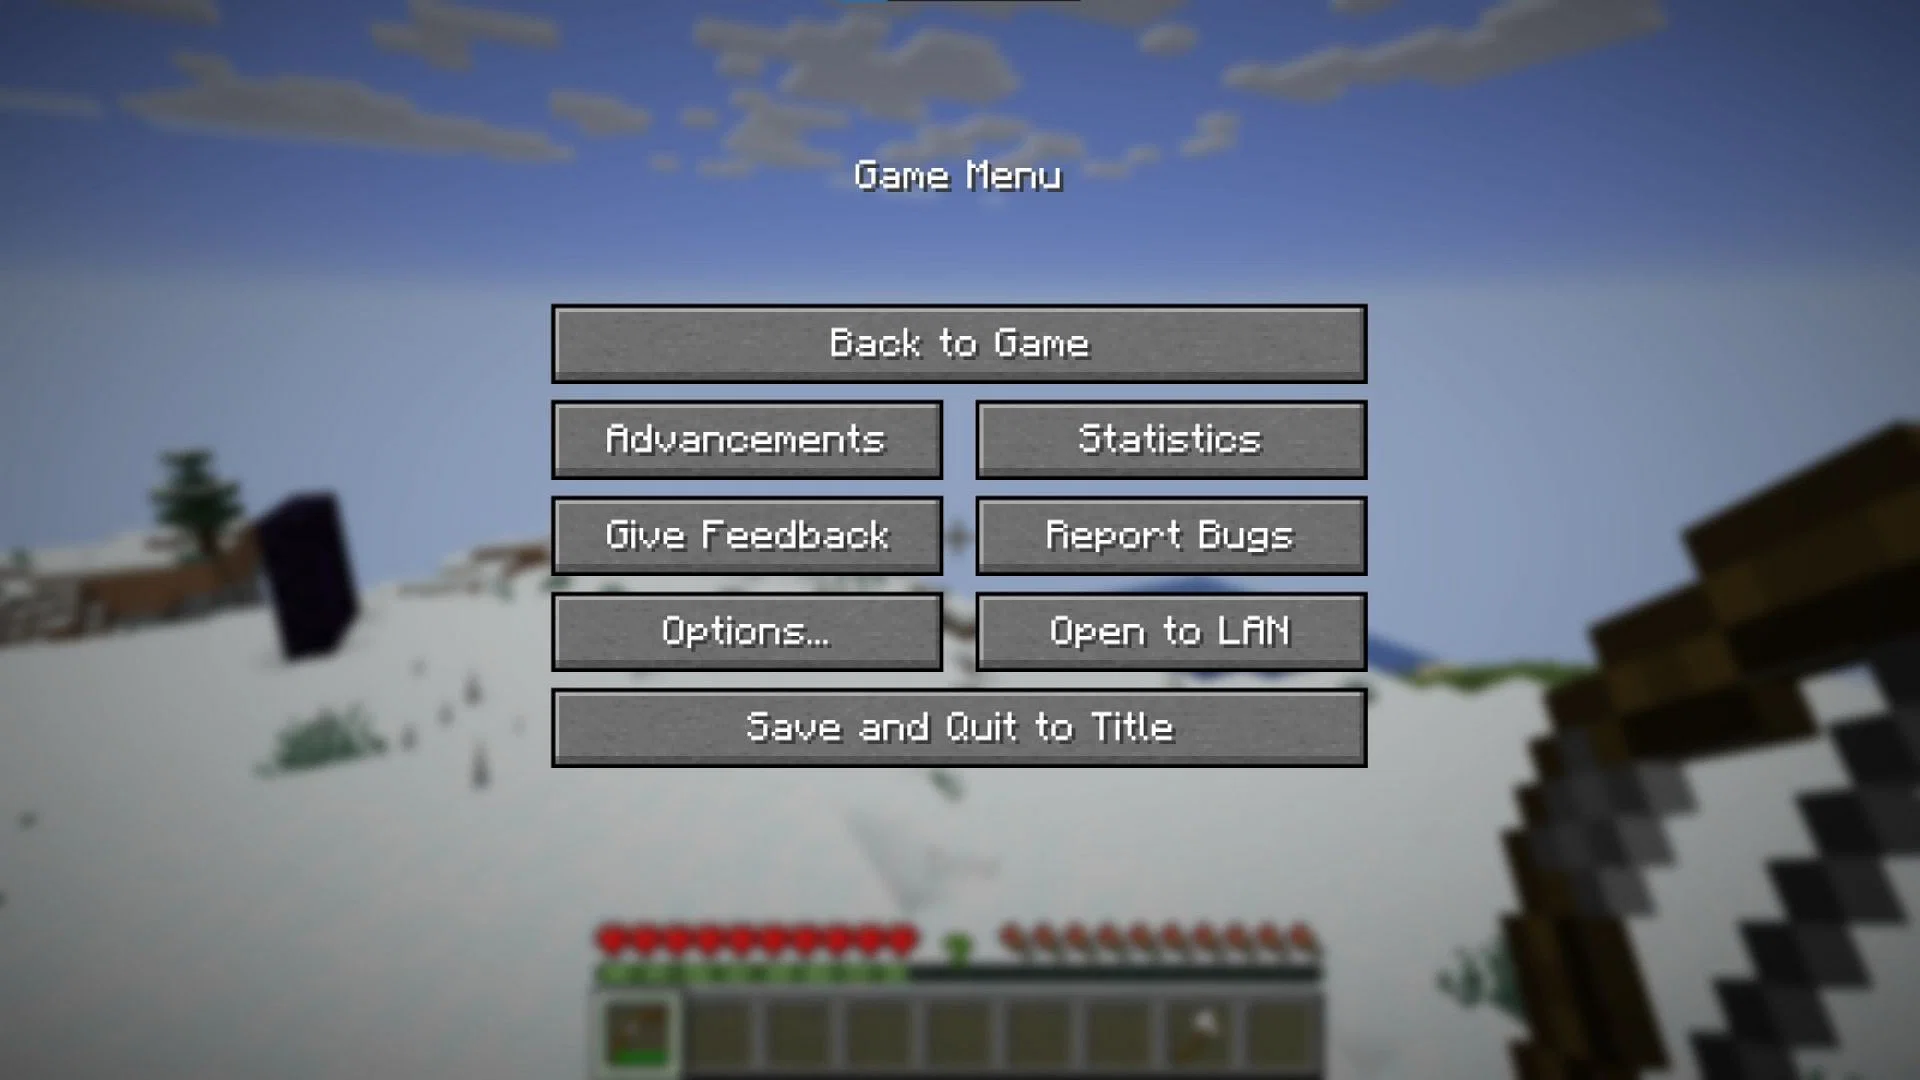
2. In the pause menu, choose the “Start a LAN world” option. You’ll see a prompt for a port key; enter any five-digit number and note it down for later use.
3. Next, you’ll need to locate your local IP address. Minimize Minecraft and open the search menu on your computer.
4. Type “cmd” into the search bar and press Enter to launch the Command Prompt.
5. In the Command Prompt window, type “ipconfig” and press Enter. This command will display your network details.
6. Find and copy your IPV4 address, which will be a series of numbers separated by periods.
After you’ve completed these steps, your friend will need to follow a few more steps to join your world.
These next steps should be performed on your friend’s device:
1. Open Minecraft and click on the “Multiplayer” tab from the main menu.
2. Select “Direct Connection” from the options available.
3. In the Server Address box, enter your IPV4 address followed by the port key, separated by a colon. It should look something like this: `192.178.14.160:xxxxx`, with `xxxxx` being your chosen five-digit port key.
4. Click “Join Server,” and your friend should be able to connect to your world.
If connection issues arise, try disabling the Windows Firewall for private networks on both devices.
For those who find setting up a LAN world too cumbersome, third-party mods like the Essential mod can simplify the process by allowing you to host multiplayer worlds easily. Alternatively, third-party servers are another option, although subscribing to Realms Plus might be more convenient at that point.
Related Articles
-
How to Experience Minecraft Console Edition Tutorial Worlds on Java and Bedrock
2024-09-25
-
Minecraft Mod: Add Bedrock Features into Minecraft Java with the Bedrockify Mod
2024-09-09
-

Juxia Figure Review - Hatsune Miku 100th Adventure Ver Preorder Now!
2025-11-27
-

Juxia Game Review – WoW Midnight Deep Dive: Release Date, Player Housing, and Prey System!
2025-11-27
-

Juxia Anime Review - 'The Demon King’s Daughter Is Too Kind!!' Anime Upcoming Adaptation!
2025-11-27
-

Juxia Anime Review - OSHI NO KO Season 3 Release Date, Trailer, and Story Predictions!
2025-11-26
-

Juxia Game Review - Koei Tecmo’s Atelier Ryza ASMR Hits DLsite!
2025-11-26
-

Juxia Game Review - Elon Musk Just Challenged LoL Pros With Grok 5, and the Internet Is Losing It!
2025-11-26
-

Juxia Game Review - The Ultimate Final Fantasy VII Remake Intergrade Switch 2 & Xbox Breakdown
2025-11-26
-

Juxia Figure Review – 15th Anniversary Junko Enoshima Figure Every Fan Needs!
2025-11-25
